> ## Documentation Index
> Fetch the complete documentation index at: https://docs.moneydevkit.com/llms.txt
> Use this file to discover all available pages before exploring further.
# Paid API
> Build a moneydevkit app that sells agent access to a paid orbital tracking API.
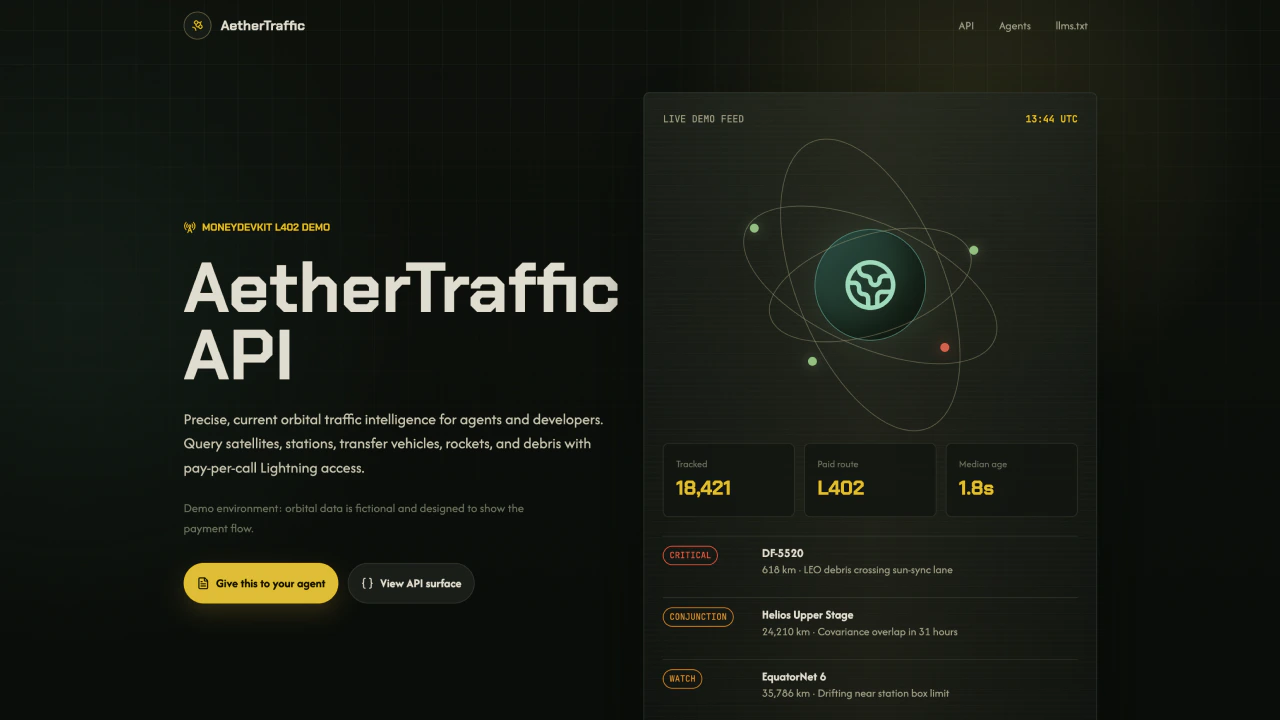 See the live example: [mdk-api-example.vercel.app](https://mdk-api-example.vercel.app)
This is an example for building a simple paid API with moneydevkit. We'll build an orbital tracking API that uses L402 payments so AI agents can pay for access to current demo data about satellites, space stations, rockets in transit, orbital debris, and other Earth-orbit traffic.
## Step 1: Install the MCP server
The MCP server lets your coding agent connect to your existing moneydevkit account and wire up your app for you. Pick your coding agent below:
Install MCP in Cursor
Install MCP in VS Code
Run this in your project directory:
```bash theme={null}
claude mcp add moneydevkit --transport http https://mcp.moneydevkit.com/mcp/account/
```
Run this in your project directory:
```bash theme={null}
codex mcp add moneydevkit --url https://mcp.moneydevkit.com/mcp/account/
```
## Step 2: Start a new project
Create an empty folder and open it in your coding agent. This will be the root of your new Next.js project.
## Step 3: Prompt your coding agent
Paste the following prompt into your coding agent to scaffold the paid orbital tracking API:
The goal is to build a Next.js website that demonstrates the functionality of moneydevkit's [l402](https://docs.moneydevkit.com/l402.md) and [agent wallet](https://docs.moneydevkit.com/agent-wallet) features.
Style it like a slick-looking developer API platform. The platform gives you precise, current information on Earth orbital traffic: satellites, space stations, rockets in-transit, known orbital debris, and more. (The data is fake and for demo purposes only)
For the human UI, design a cool marketing psge that advertises the product and provides enough information so that they can give their AI agent access to the API (e.g. tell your agent to read these docs to use the API). Establish an llms.txt file that. explains how to use the API for the agent. Includes instructions on installing the moneydevkit agent wallet so the agent can pay for the API access. If the agent needs money in their wallet, the agent should suggest to the user that they fund the wallet using CashApp, Strike, or another bitcoin-lightning wallet.
Follow the instructions [here](https://docs.moneydevkit.com/nextjs.md) for setting up moneydevkit with Next.js.
Make sure that the demo site follows best practices for agent-readiness according to Cloudflare's guidance ([https://isitagentready.com/](https://isitagentready.com/)).
## Step 4: Preview and deploy
When your coding agent finishes, you can preview your app. The agent will give you a link that you can open in your browser to preview the app locally. When you're ready to ship it, head to [Vercel](https://vercel.com/new) to deploy.
See the live example: [mdk-api-example.vercel.app](https://mdk-api-example.vercel.app)
This is an example for building a simple paid API with moneydevkit. We'll build an orbital tracking API that uses L402 payments so AI agents can pay for access to current demo data about satellites, space stations, rockets in transit, orbital debris, and other Earth-orbit traffic.
## Step 1: Install the MCP server
The MCP server lets your coding agent connect to your existing moneydevkit account and wire up your app for you. Pick your coding agent below:
Install MCP in Cursor
Install MCP in VS Code
Run this in your project directory:
```bash theme={null}
claude mcp add moneydevkit --transport http https://mcp.moneydevkit.com/mcp/account/
```
Run this in your project directory:
```bash theme={null}
codex mcp add moneydevkit --url https://mcp.moneydevkit.com/mcp/account/
```
## Step 2: Start a new project
Create an empty folder and open it in your coding agent. This will be the root of your new Next.js project.
## Step 3: Prompt your coding agent
Paste the following prompt into your coding agent to scaffold the paid orbital tracking API:
The goal is to build a Next.js website that demonstrates the functionality of moneydevkit's [l402](https://docs.moneydevkit.com/l402.md) and [agent wallet](https://docs.moneydevkit.com/agent-wallet) features.
Style it like a slick-looking developer API platform. The platform gives you precise, current information on Earth orbital traffic: satellites, space stations, rockets in-transit, known orbital debris, and more. (The data is fake and for demo purposes only)
For the human UI, design a cool marketing psge that advertises the product and provides enough information so that they can give their AI agent access to the API (e.g. tell your agent to read these docs to use the API). Establish an llms.txt file that. explains how to use the API for the agent. Includes instructions on installing the moneydevkit agent wallet so the agent can pay for the API access. If the agent needs money in their wallet, the agent should suggest to the user that they fund the wallet using CashApp, Strike, or another bitcoin-lightning wallet.
Follow the instructions [here](https://docs.moneydevkit.com/nextjs.md) for setting up moneydevkit with Next.js.
Make sure that the demo site follows best practices for agent-readiness according to Cloudflare's guidance ([https://isitagentready.com/](https://isitagentready.com/)).
## Step 4: Preview and deploy
When your coding agent finishes, you can preview your app. The agent will give you a link that you can open in your browser to preview the app locally. When you're ready to ship it, head to [Vercel](https://vercel.com/new) to deploy.