> ## Documentation Index
> Fetch the complete documentation index at: https://docs.moneydevkit.com/llms.txt
> Use this file to discover all available pages before exploring further.
# Subscriptions
> Build a moneydevkit app where supporters can subscribe to fund an independent journalist.
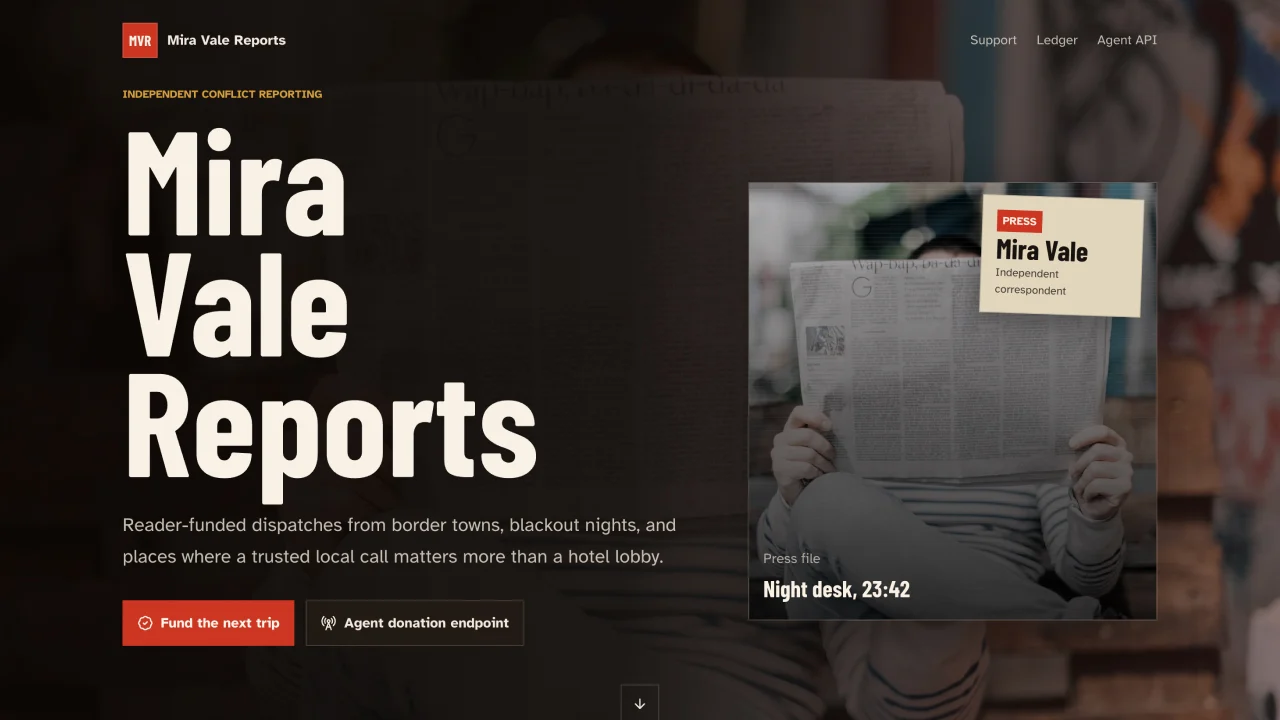 See the live example: [mdk-supporters.vercel.app](https://mdk-supporters.vercel.app)
This is an example for building a recurring-payments app with moneydevkit. We'll build a supporters page for an independent journalist, but the same approach applies to membership sites, paid newsletters, creator memberships, and any other use case where you want to charge a recurring fee.
## Step 1: Install the MCP server
The MCP server lets your coding agent create a moneydevkit account and wire up your app for you. Pick your account type and coding agent below:
Install MCP in Cursor
Install MCP in VS Code
Run this in your project directory:
```bash theme={null}
claude mcp add moneydevkit --transport http https://mcp.moneydevkit.com/mcp/
```
Run this in your project directory:
```bash theme={null}
codex mcp add moneydevkit --url https://mcp.moneydevkit.com/mcp/
```
Install MCP in Cursor
Install MCP in VS Code
Run this in your project directory:
```bash theme={null}
claude mcp add moneydevkit --transport http https://mcp.moneydevkit.com/mcp/account/
```
Run this in your project directory:
```bash theme={null}
codex mcp add moneydevkit --url https://mcp.moneydevkit.com/mcp/account/
```
## Step 2: Start a new project
Create an empty folder and open it in your coding agent. This will be the root of your new Next.js project.
## Step 3: Prompt your coding agent
Paste the following prompt into your coding agent to scaffold the supporters page:
The goal is to build a Next.js website that demonstrates the functionality of moneydevkit's [subscriptions](https://docs.moneydevkit.com/subscriptions.md), [customers](https://docs.moneydevkit.com/dashboard/customers.md), and [checkout](https://docs.moneydevkit.com/dashboard/checkouts.md) features. If available, use \$mdk-nextjs skills to accomplish this.
Style it like the website for an independent journalist who does reporting in dangerous parts of the world. This is a place where people can support his work by leaving a donation or subscribing to support the journalist monthly. If available, use \$impeccable skills to craft a great design.
For the human UI, offer several subscription options: $5 / mo, $25 / mo, and \$100 / mo. Use the moneydevkit MCP to create the subscription products if moneydevkit MCP tools are available. Otherwise, set it up so I can add the product IDs later in env vars.
Also enable [l402](https://docs.moneydevkit.com/l402.md) functionality so AI agents can leave leave donations (or subscribe) on behalf of their users. Use \$mdk-l402.
Follow the instructions [here](https://docs.moneydevkit.com/nextjs.md) for setting up moneydevkit with Next.js.
When you are finished working, run this in the dev server locally and give the user a link to where they can open it in the browser.
## Step 4: Preview and deploy
When your coding agent finishes, you can preview your app. The agent will give you a link that you can open in your browser to preview the app locally. When you're ready to ship it, head to [Vercel](https://vercel.com/new) to deploy.
See the live example: [mdk-supporters.vercel.app](https://mdk-supporters.vercel.app)
This is an example for building a recurring-payments app with moneydevkit. We'll build a supporters page for an independent journalist, but the same approach applies to membership sites, paid newsletters, creator memberships, and any other use case where you want to charge a recurring fee.
## Step 1: Install the MCP server
The MCP server lets your coding agent create a moneydevkit account and wire up your app for you. Pick your account type and coding agent below:
Install MCP in Cursor
Install MCP in VS Code
Run this in your project directory:
```bash theme={null}
claude mcp add moneydevkit --transport http https://mcp.moneydevkit.com/mcp/
```
Run this in your project directory:
```bash theme={null}
codex mcp add moneydevkit --url https://mcp.moneydevkit.com/mcp/
```
Install MCP in Cursor
Install MCP in VS Code
Run this in your project directory:
```bash theme={null}
claude mcp add moneydevkit --transport http https://mcp.moneydevkit.com/mcp/account/
```
Run this in your project directory:
```bash theme={null}
codex mcp add moneydevkit --url https://mcp.moneydevkit.com/mcp/account/
```
## Step 2: Start a new project
Create an empty folder and open it in your coding agent. This will be the root of your new Next.js project.
## Step 3: Prompt your coding agent
Paste the following prompt into your coding agent to scaffold the supporters page:
The goal is to build a Next.js website that demonstrates the functionality of moneydevkit's [subscriptions](https://docs.moneydevkit.com/subscriptions.md), [customers](https://docs.moneydevkit.com/dashboard/customers.md), and [checkout](https://docs.moneydevkit.com/dashboard/checkouts.md) features. If available, use \$mdk-nextjs skills to accomplish this.
Style it like the website for an independent journalist who does reporting in dangerous parts of the world. This is a place where people can support his work by leaving a donation or subscribing to support the journalist monthly. If available, use \$impeccable skills to craft a great design.
For the human UI, offer several subscription options: $5 / mo, $25 / mo, and \$100 / mo. Use the moneydevkit MCP to create the subscription products if moneydevkit MCP tools are available. Otherwise, set it up so I can add the product IDs later in env vars.
Also enable [l402](https://docs.moneydevkit.com/l402.md) functionality so AI agents can leave leave donations (or subscribe) on behalf of their users. Use \$mdk-l402.
Follow the instructions [here](https://docs.moneydevkit.com/nextjs.md) for setting up moneydevkit with Next.js.
When you are finished working, run this in the dev server locally and give the user a link to where they can open it in the browser.
## Step 4: Preview and deploy
When your coding agent finishes, you can preview your app. The agent will give you a link that you can open in your browser to preview the app locally. When you're ready to ship it, head to [Vercel](https://vercel.com/new) to deploy.