Products are pre-configured items you can sell through moneydevkit. Instead of specifying amount and description for each checkout, you can reference a product by ID and the checkout will use the product’s price and details.
What are Products?
Products let you define reusable items with fixed or variable pricing. When you create a checkout using a product, the checkout automatically uses the product’s name, description, and price configuration.
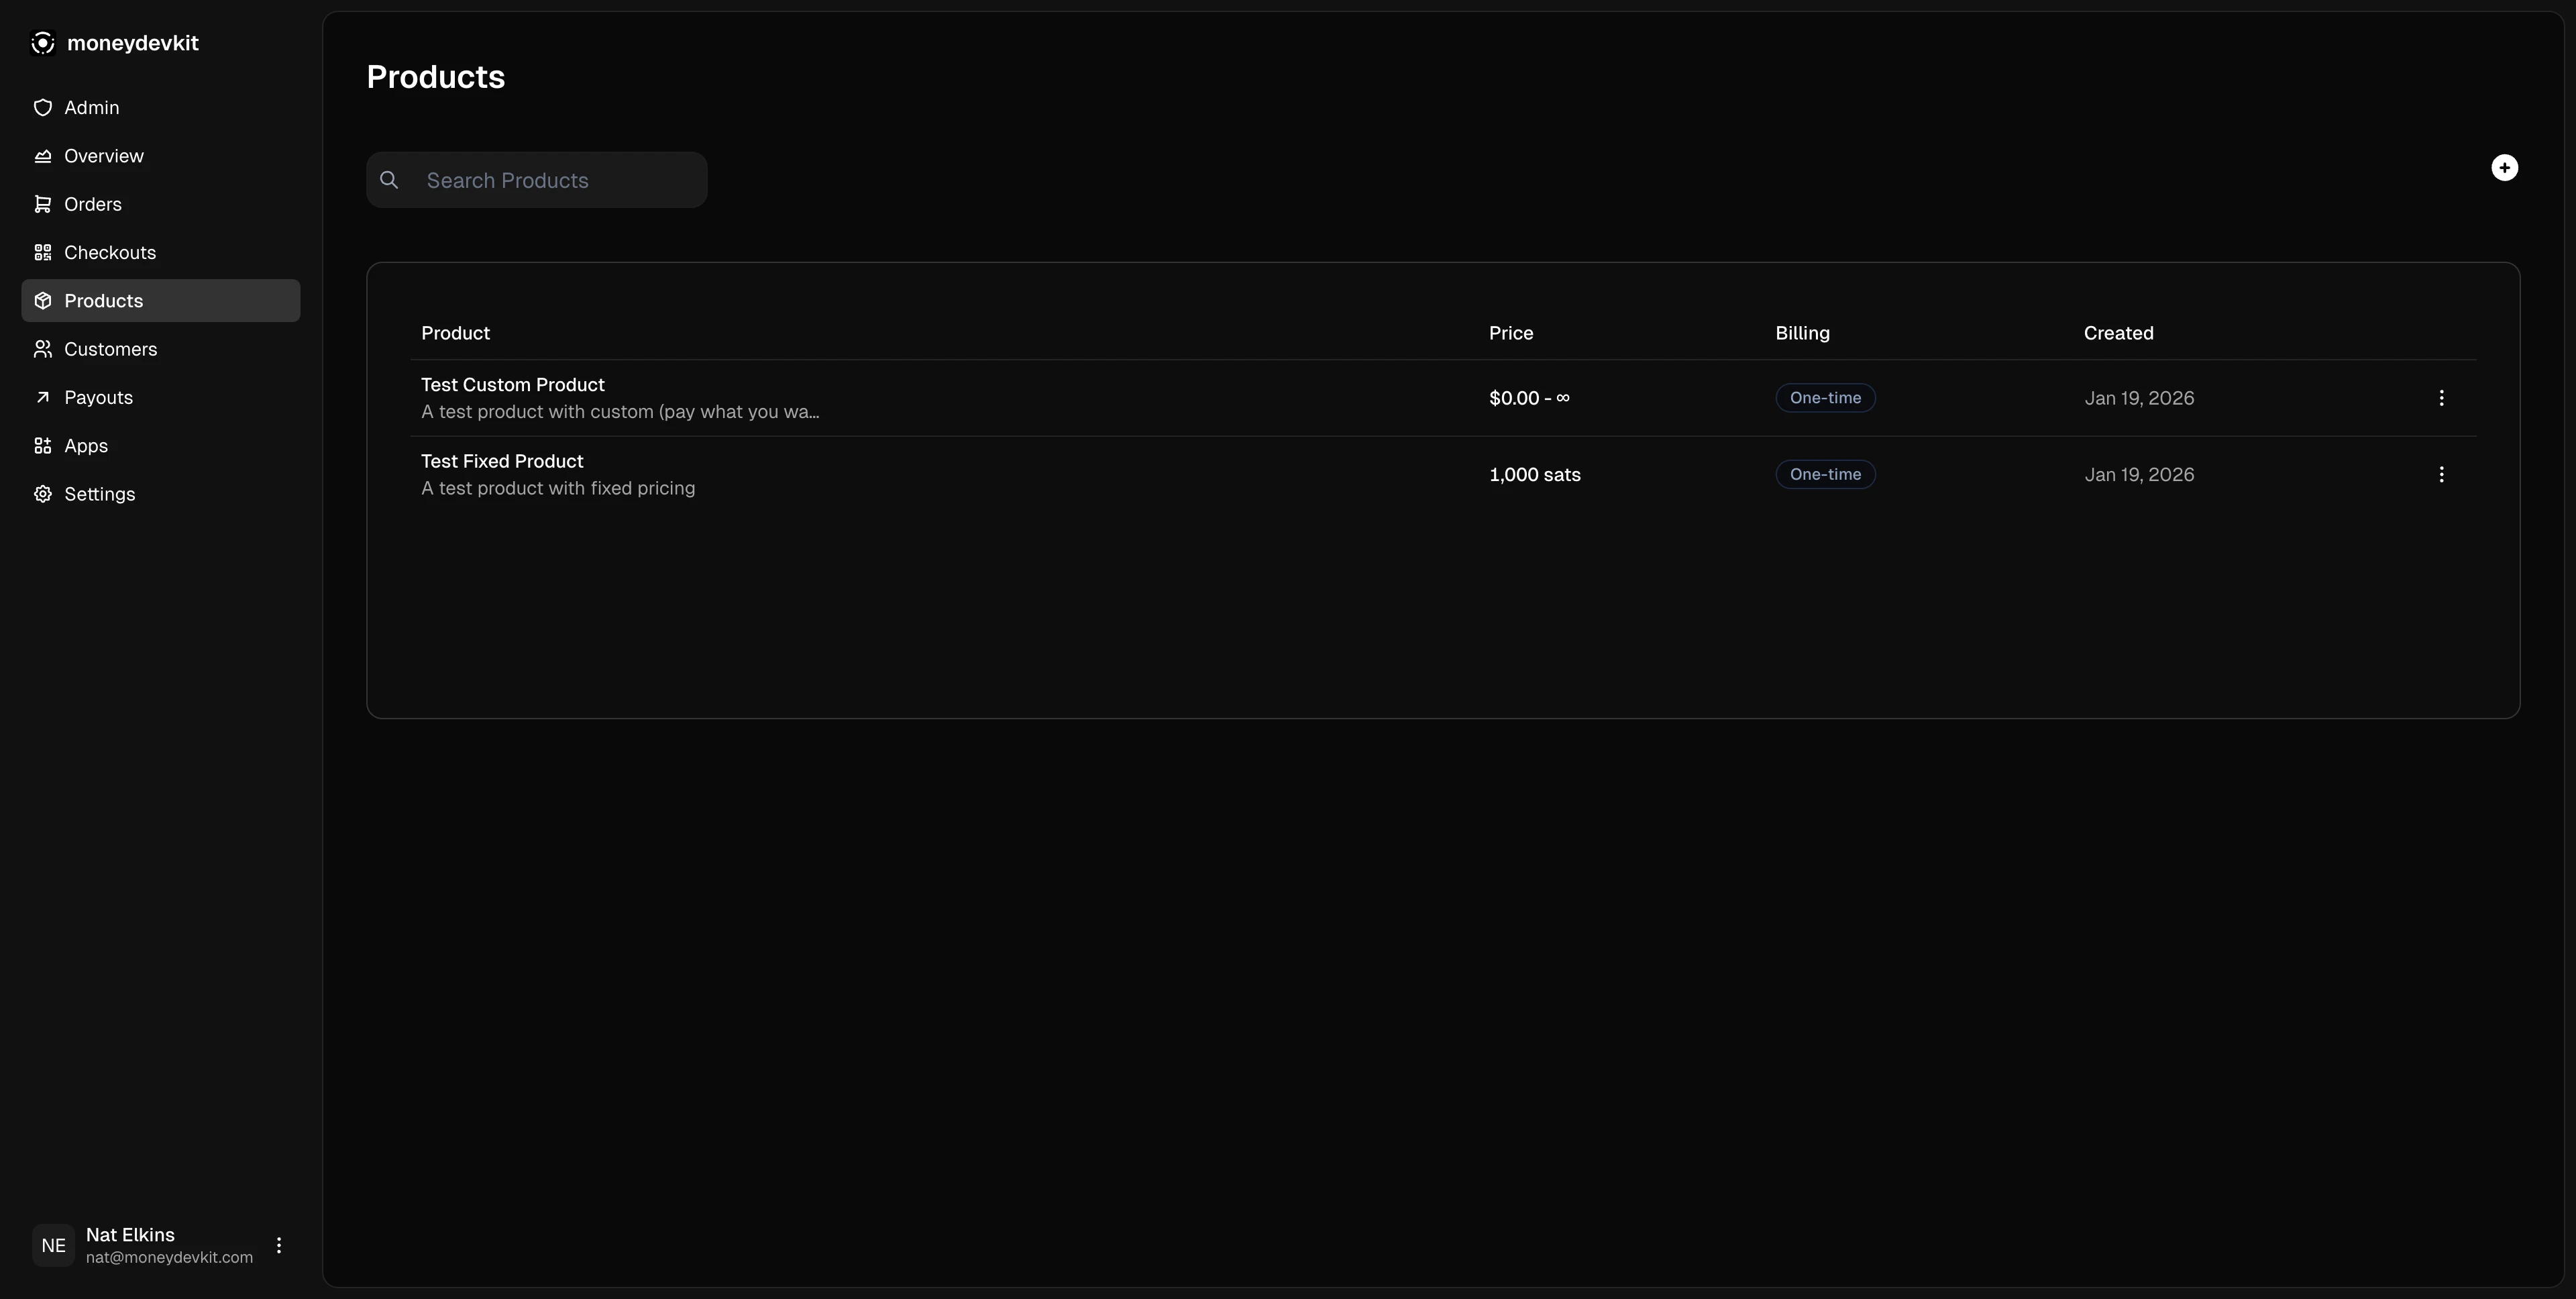
Products Dashboard
The products page in your moneydevkit dashboard displays all your products:
Each product shows:
- Product name and description
- Price - Fixed amount or “Pay what you want” range
- Billing - One-time
- Created date
- Actions - View details, edit, or delete
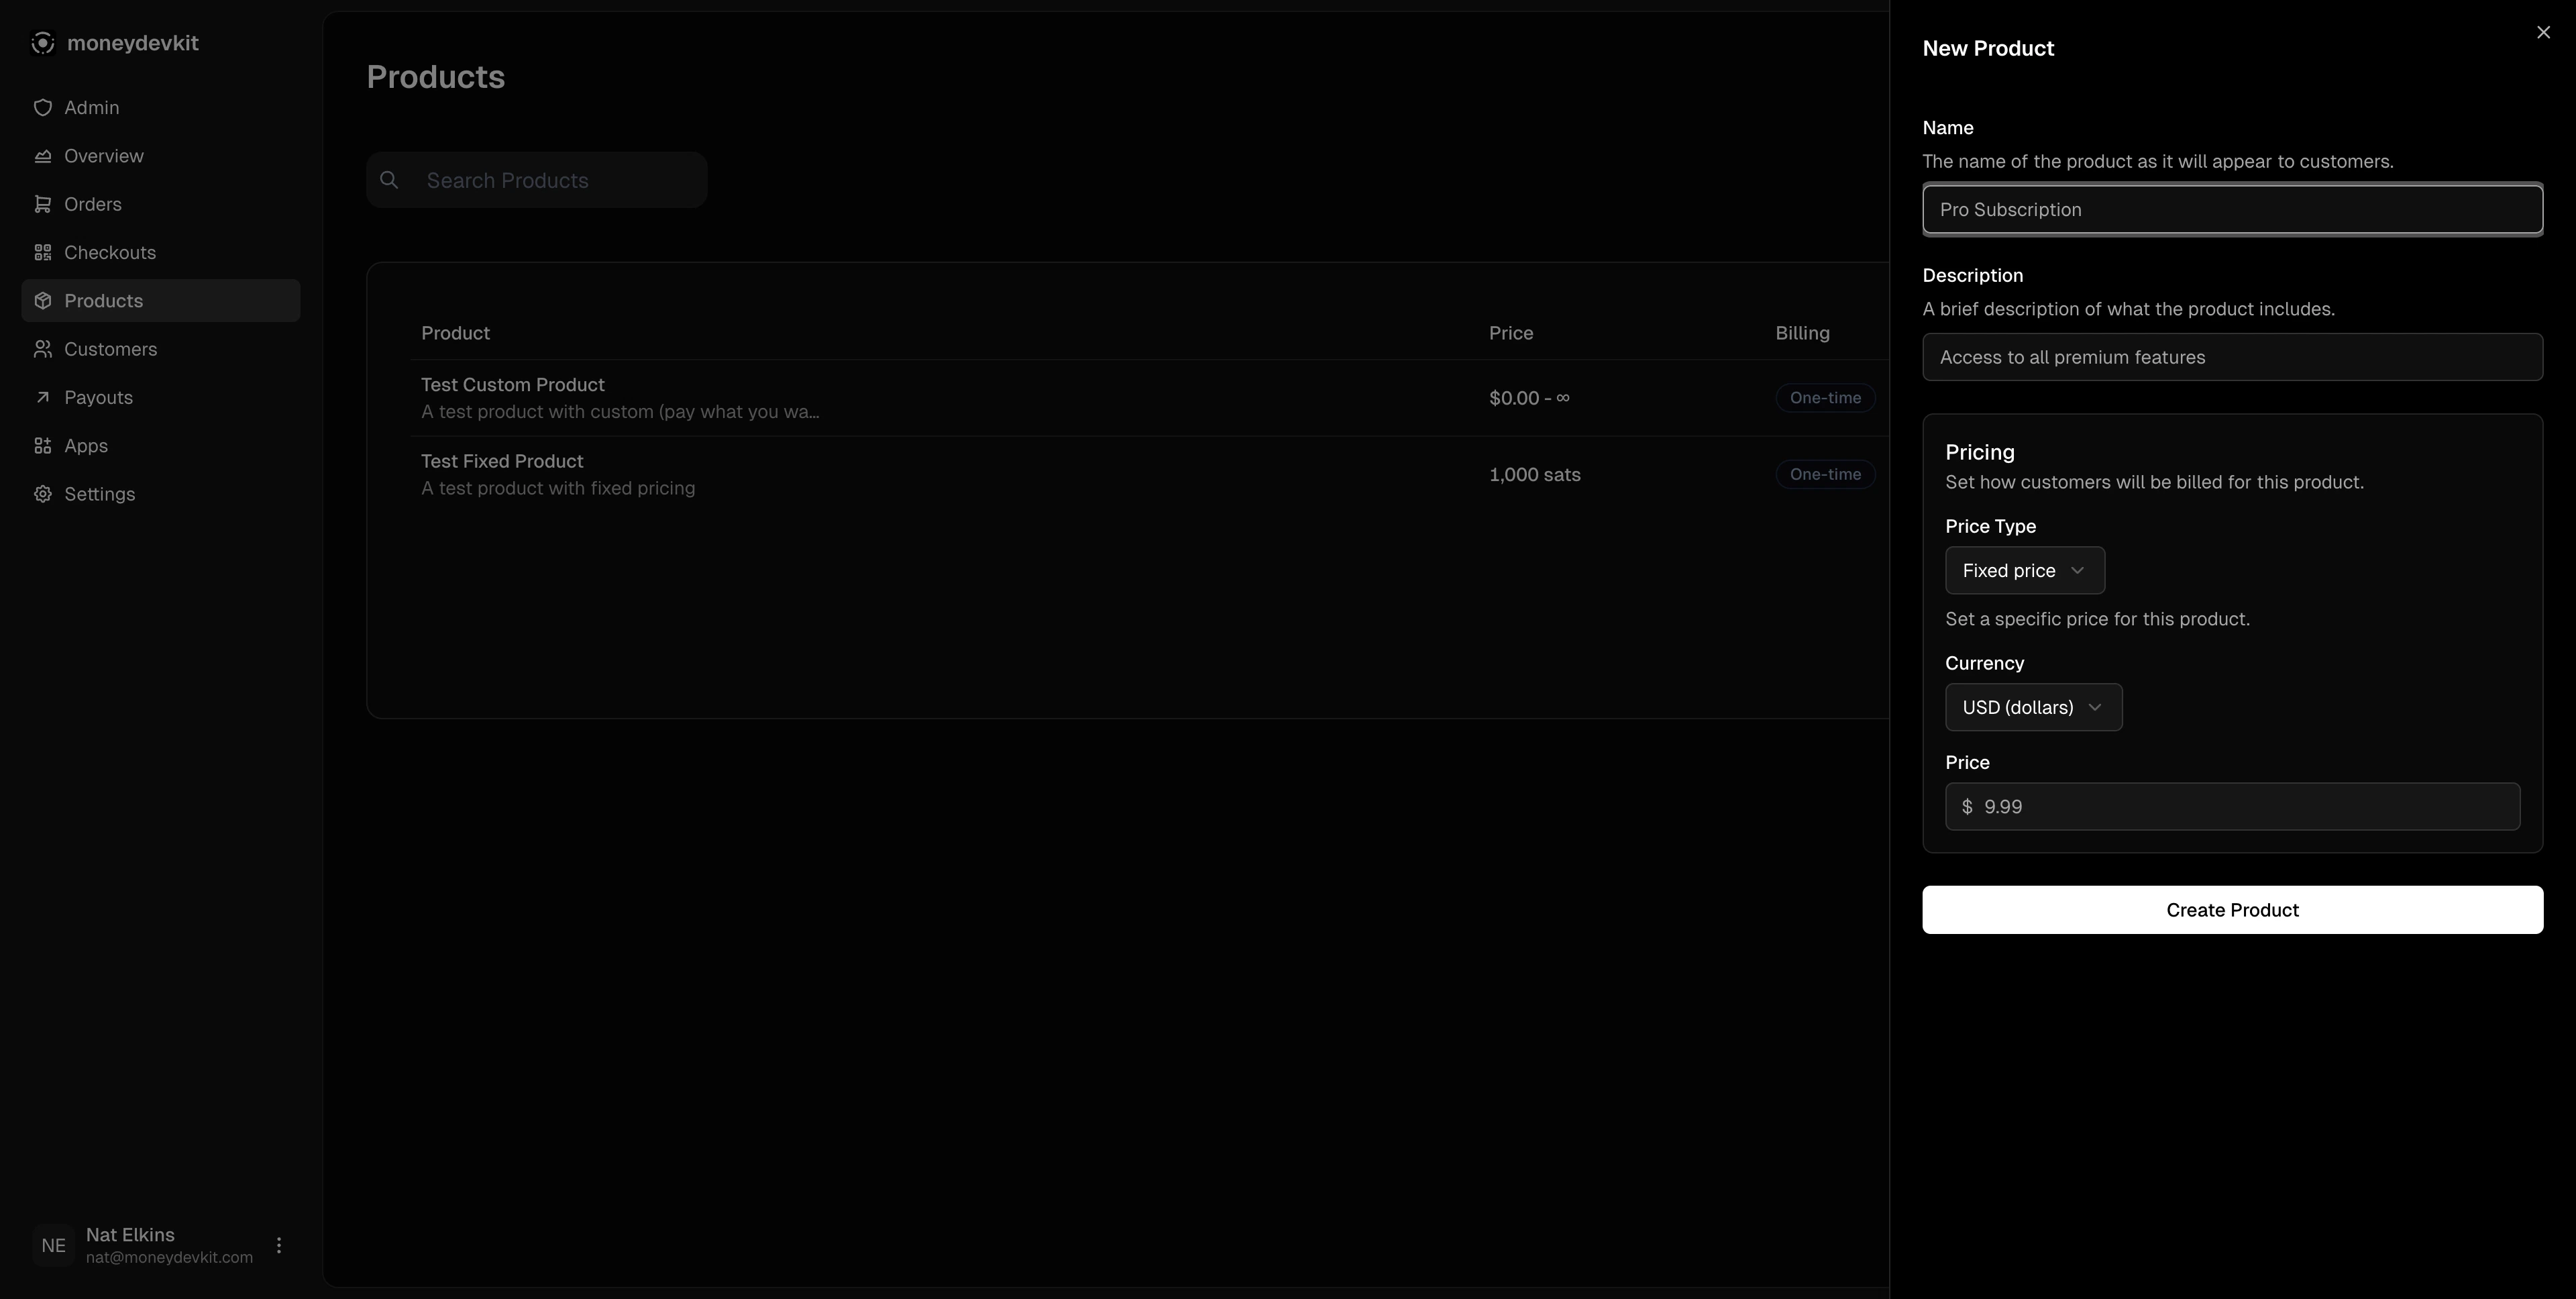
Creating a Product
- Navigate to Products in the dashboard
- Click the + button in the top right
- Fill in the product details:
- Name - Product name shown to customers
- Description - Brief description of what’s included
- Price Type - Fixed price or Pay what you want
- Currency - USD (dollars) or SAT (satoshis)
- Price - Amount (for fixed price products)
- Click Create Product
Pricing Options
| Type | Description | Use Case |
|---|
| Fixed price | Set specific amount | Standard products, subscriptions |
| Pay what you want | Customer chooses amount | Donations, tips, pay-what-you-can |
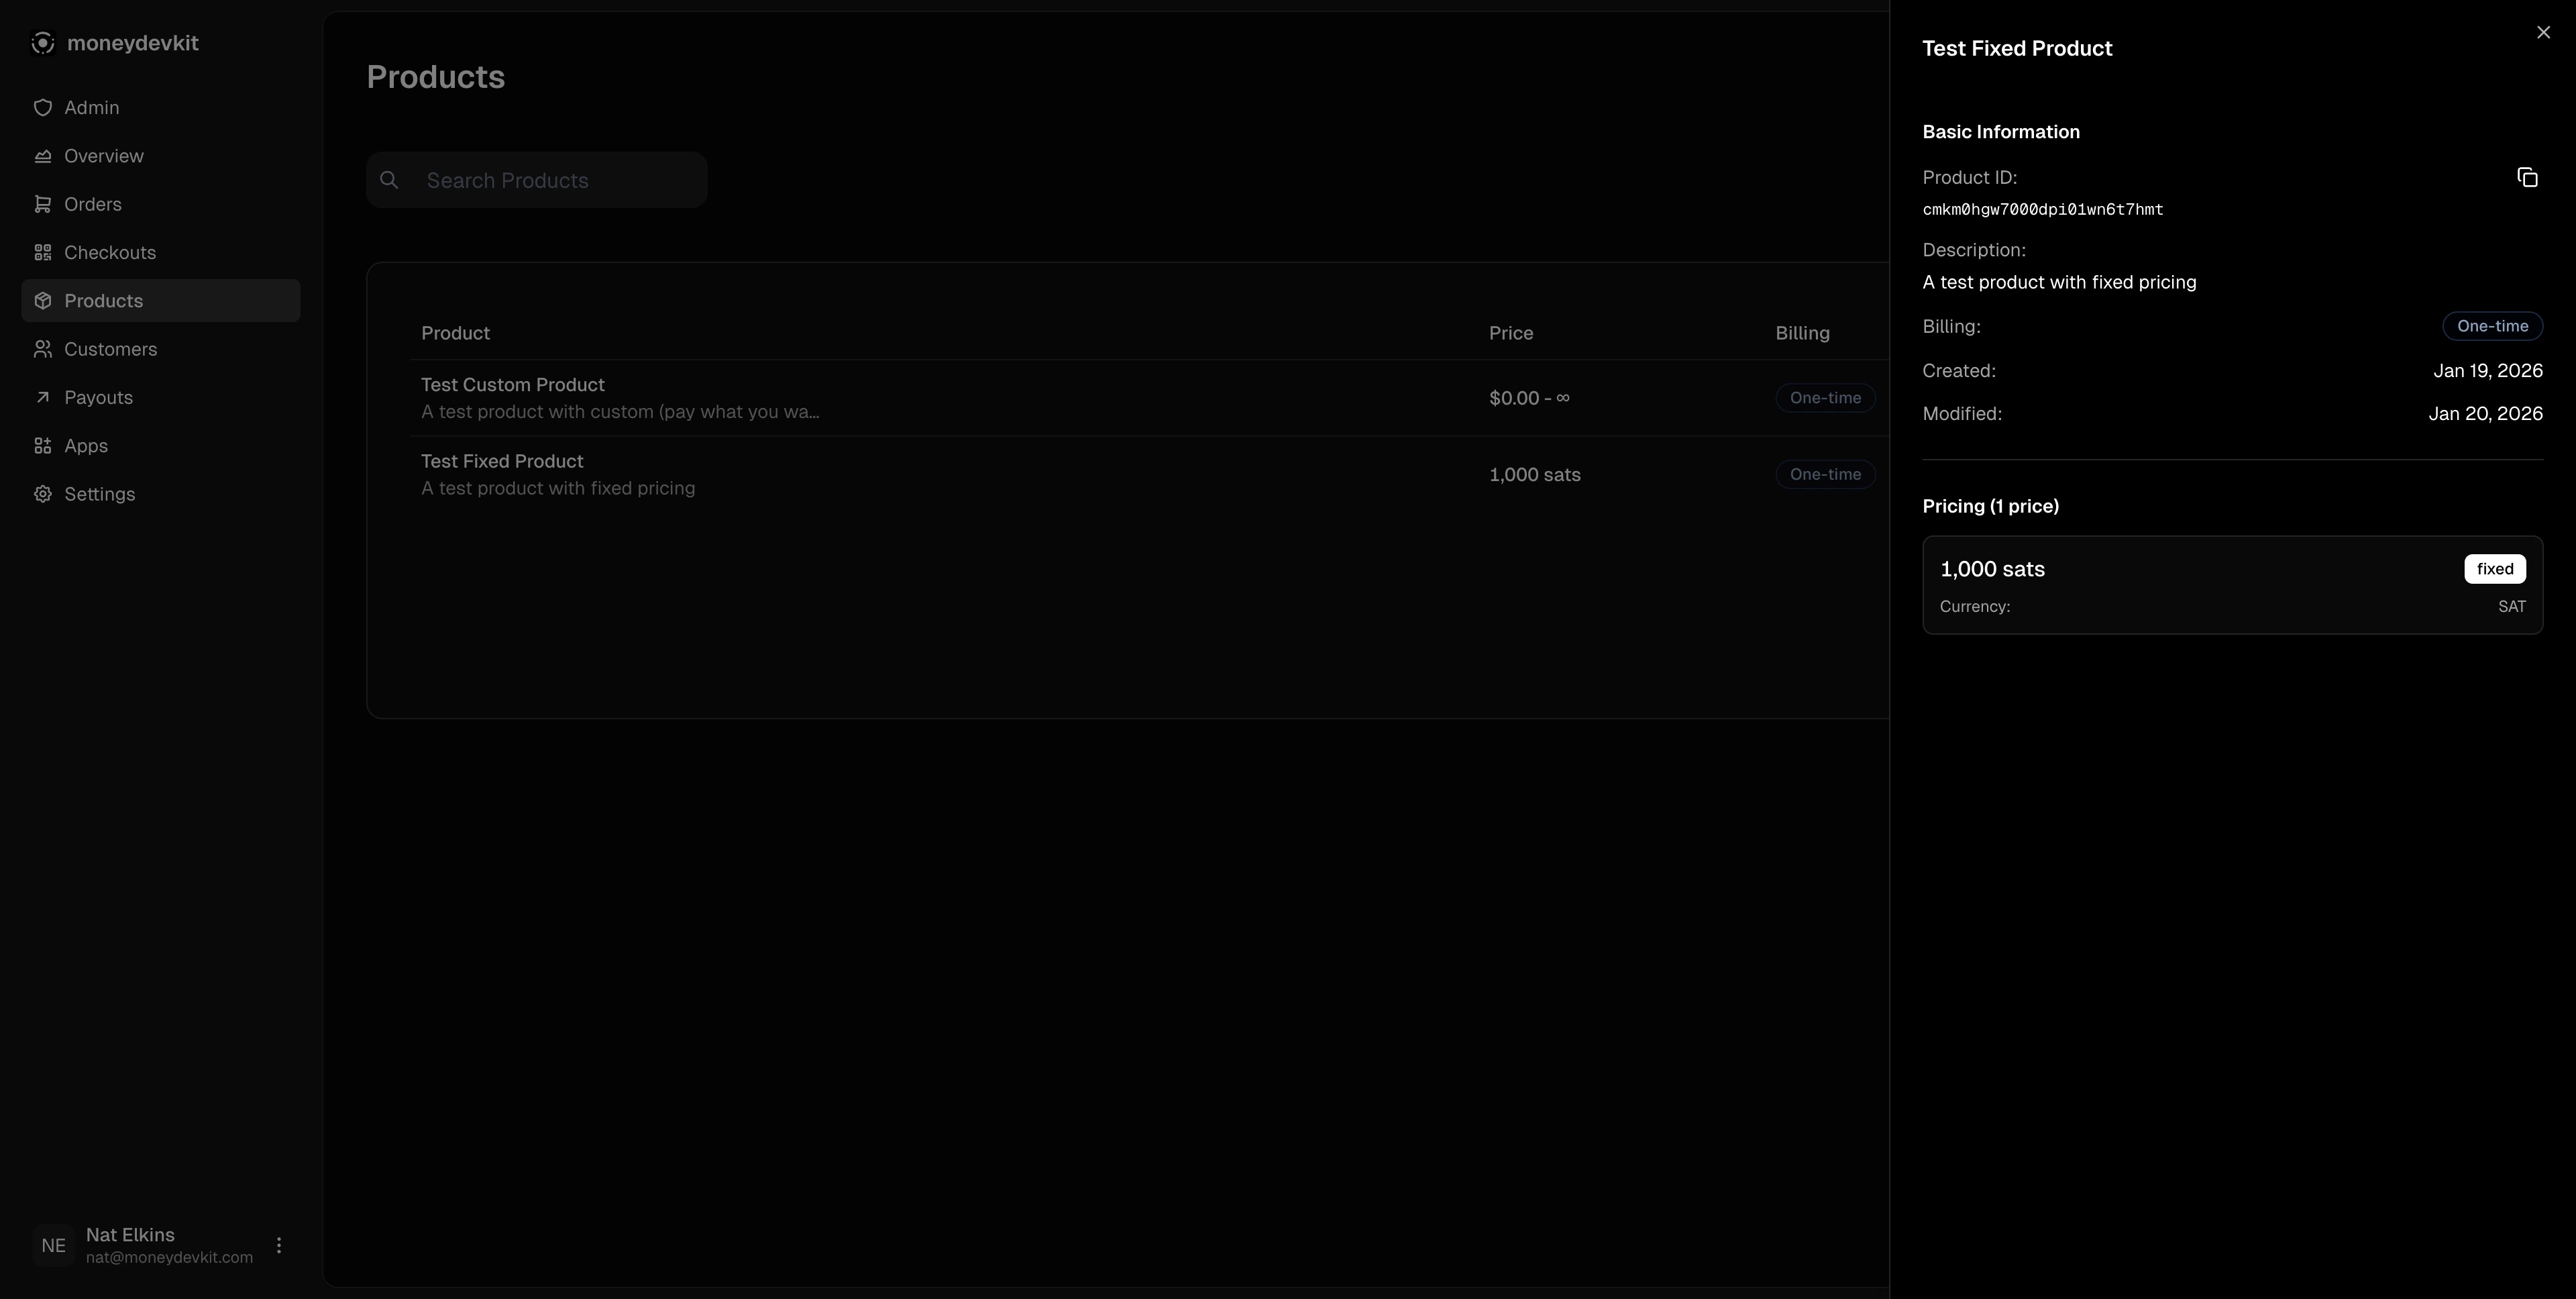
Product Details
Click any product to view its details in a sidebar:
- Product ID - Unique identifier (click to copy)
- Description - Product description
- Billing - One-time or subscription interval
- Created/Modified - Timestamps
- Pricing - Price amount, type, and currency
Using Products in Code
Fetch Available Products
import { useProducts } from '@moneydevkit/nextjs'

function ProductList() {
  const { products, isLoading, error } = useProducts()

  if (isLoading) return <p>Loading products...</p>
  if (error) return <p>Error: {error.message}</p>

  return (
    <ul>
      {products.map(product => (
        <li key={product.id}>{product.name}</li>
      ))}
    </ul>
  )
}
Create a Product Checkout
import { useCheckout, useProducts } from '@moneydevkit/nextjs'

function BuyProduct() {
  const { createCheckout, isLoading } = useCheckout()
  const { products } = useProducts()

  const handleBuy = async (productId: string) => {
    const result = await createCheckout({
      type: 'PRODUCTS',
      product: productId,
      successUrl: '/checkout/success',
    })

    if (result.error) {
      console.error(result.error.message)
      return
    }

    window.location.href = result.data.checkoutUrl
  }

  return (
    <div>
      {products.map(product => (
        <button
          key={product.id}
          onClick={() => handleBuy(product.id)}
          disabled={isLoading}
        >
          Buy {product.name}
        </button>
      ))}
    </div>
  )
}
When using product checkouts, you don’t need to specify amount or currency - these are automatically pulled from the product’s price configuration.
Checkout Types
| Type | Description | Required Fields |
|---|
type: 'PRODUCTS' | Sell products from your dashboard | product (product ID) |
type: 'AMOUNT' | Dynamic amounts for donations, tips, invoices | amount, currency |
Use products when you have fixed catalog items. Use amount checkouts for dynamic pricing scenarios like invoices or custom quotes.
Pay What You Want (CUSTOM prices)
Products can have CUSTOM prices that let customers choose their own amount. When a checkout includes a product with a CUSTOM price, the checkout UI automatically shows an amount input field:
const result = await createCheckout({
  type: 'PRODUCTS',
  product: customPriceProductId,  // Product configured with CUSTOM price in dashboard
  successUrl: '/checkout/success',
})